Carpets are an essential part of many homes, providing comfort, warmth, and an added touch of style. However, the unsung hero beneath your carpet is the underlay, which not only improves the feel and durability of your carpet but also helps with insulation and noise reduction. Like carpets, underlays too can accumulate dirt and dust over time, making it crucial for homeowners to know the proper methods of cleaning them.
To clean carpet underlays start by removing the surface carpet and vacuuming loose dirt and debris, especially near edges and under furniture. Next, treat identified overlay stains with specific best suited spot-cleaning techniques and thoroughly dry underlays before reinstalling carpets.
The remainder of this article will guide you through a step-by-step process to effectively clean your carpet underlay and maintain its longevity. By following these methods, you can effortlessly rejuvenate your home’s flooring and breathe new life into your favorite carpeted spaces. So, gather your cleaning supplies and get ready to give your carpet underlay the attention it deserves.
9 Steps To Cleaning Carpet Underlays
Below is a step by step guide that walks you through every single step of cleaning your carpet underlays:
Gather Essential Tools and Materials
As with any cleaning process, the first step to cleaning carpet underlays is gathering necessary tools and supplies for the process. Thankfully, you won’t need that too many tools to carry out the process:
- Vacuum cleaner: A crucial tool for cleaning your carpet underlay is a vacuum cleaner. It is essential to remove dirt, dust, and debris before proceeding with any wet cleaning methods. A vacuum cleaner with a HEPA filter is recommended to ensure the most effective removal of particles.
- Industrial vacuum: If your carpet’s underlay is particularly dirty or covers a large area, consider using an industrial vacuum. These vacuums are more powerful and capable of handling larger particles, making them ideal for thorough cleaning.
Some other essential materials to gather for cleaning the underlay include:
- Oxygen bleach or another eco-friendly cleaning agent
- A clean cloth or sponge
- Rubber gloves for protection
- A dehumidifier
- An industrial fan for drying
- Utility knife
- Gloves
- Pliers
- Screwdriver
- Tape measure
- Soft-bristled brush
- Microfiber cloth
Preparation and Safety
Now that we have gathered the necessary tools, the next immediate step to think about the cleaning preparation and safety. Before cleaning your carpet underlay, proper preparation and safety measures are essential. First, remove any furniture from the room to ensure easy access to the entire carpeted area. If necessary, request assistance from others to safely move heavier furniture pieces.
In addition to that, when working with cleaning solutions, it’s important to wear protective gear. This includes:
- Gloves: To shield your hands from harsh chemicals and potential allergens
- Mask: To prevent the inhalation of dust and cleaning product fumes
- Comfortable clothing: Choose clothes that provide coverage but also allow for ease of movement
With these key preparation and safety measures in place, you’re ready to embark on cleaning your carpet underlay effectively and safely.
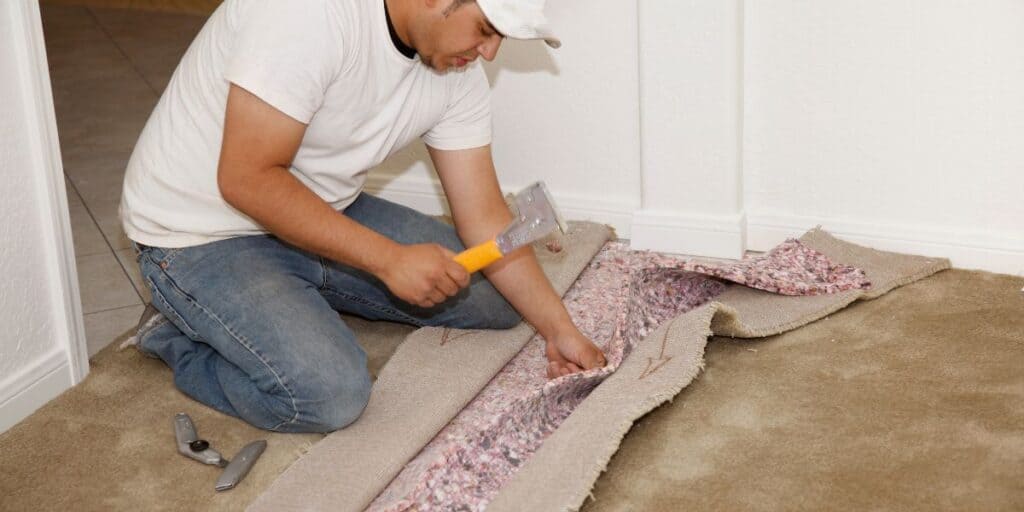
Removing the Surface Carpet
As a DIY project, to remove surface carpet, you’ll need the following tools:
- Utility knife
- Gloves
- Pliers
- Screwdriver
- Tape measure
Here’s the step-by-step process for removing the surface carpet:
- Start at one corner of the room, using pliers to grip the edge of the carpet and gently pull it up from the tack strips.
- As you lift the carpet, roll it towards the center of the room. This will make it easier to handle and transport.
- Once the carpet is rolled, secure it with tape or string for easier disposal. If you plan to reuse the carpet, be careful not to damage it during the removal process.
When removing carpet from stairs, always start at the top and work your way down. This will make it easier and safer as you proceed.
For laminate or hardwood flooring, be cautious not to damage the surface during removal. Using a gentle touch, remove any adhesive residue with a suitable cleaner.
Inspecting and Vacuuming the Underlay
After successfully removing the carpet, before you start cleaning your carpet underlay, it’s important to inspect it for any visible dirt, debris, and grit. Look out for any clumps of pet hair, food crumbs, or other larger particles. Here’s a step-by-step guide to vacuuming your underlay effectively:
- Remove any visible debris with a dustpan and brush. This will make it easier to vacuum the underlay without clogging your vacuum cleaner. Be thorough, as grit and debris can damage the underlay and decrease its lifespan.
- Attach the appropriate tool to your vacuum cleaner, such as a hose or wand attachment. These tools can help you reach tight spaces and provide optimal suction for efficient underlay cleaning.
- Check that your vacuum cleaner’s bag or filter is empty and clean. A full bag or clogged filter can hinder suction and make it difficult to remove dirt effectively. Consider investing in a vacuum cleaner with a HEPA filter to ensure the best cleaning results.
- Start vacuuming by passing your vacuum cleaner slowly and methodically over the exposed carpet underlay. Be sure to move in different directions to ensure that you’re covering the entire surface area. Remember to focus on high-traffic areas, where dirt and debris are likely to accumulate.
- For deeper cleaning, you can use a vacuum cleaner with a foam attachment specifically designed to remove dirt from the underlay. This attachment works by agitating the dirt, allowing it to be more effectively removed by the suction feature of your vacuum cleaner.
As you vacuum the underlay, keep an eye out for any lingering dirt or debris. If necessary, use a dustpan to collect anything that your vacuum cleaner may have missed. By thoroughly inspecting and vacuuming the underlay, you’ll help maintain its longevity and provide a cleaner, more comfortable surface for your carpet.
Identifying Stains and Issues
Once you have thoroughly vacuumed your carpet underlay, identifying stains and issues is the crucial next step. By recognizing the type of stain, you can effectively tackle it and restore your carpet’s original appearance.
- Check for stains caused by various spills, like wine, coffee, or food. If possible, try to determine the stain’s origin, as different stains require different treatments.
- Search for signs of mold and mildew, which may appear as dark spots or a distinct musty odor. Mold can be detrimental to your health, so addressing it promptly is essential.
- Assess the extent of any water damage caused by leaks or flooding. This could lead to discoloration, warping, or delamination in the underlay.
- Identify any heavily soiled areas that may need extra attention during cleaning. These areas might include high-traffic zones, spots near entryways, or places where spills have occurred.
By carefully examining your carpet underlay and identifying any potential issues, you can address them effectively and ensure a thorough cleaning.
Addressing Mold and Mildew
Mold and mildew can be a persistent issue when it comes to your carpet underlay. While identifying stains and issues, if you found signs of this problem, this is what you need to tackle first. Follow the steps below to address mold and mildew effectively:
- Ventilate the area: Begin by opening windows and doors in the room, allowing fresh air to circulate and help in the drying process.
- Protect yourself: When dealing with mold and mildew, put on rubber gloves to protect your hands from any potential reactions, and wear a mask to avoid inhaling spores.
- Prepare a cleaning solution: Mix oxygen bleach with water, following the manufacturer’s instructions, and create a powerful but gentle solution for removing mold and mildew from the carpet underlay.
- Apply the solution: Using a clean cloth, apply the oxygen bleach solution to the moldy or mildewed areas. Gently press the cloth into the underlay, ensuring that the solution penetrates the material. Alternatively, you can also use regular bleach as a cleaning solution; however, it tends to be harsher on the material. Make sure to dilute it adequately before use.
- Let it sit: Allow the cleaning solution to sit on the affected areas for about 10 to 15 minutes, to effectively disinfect and break down the mold and mildew.
- Rinse and dry: Rinse the cleaned areas with water and a new clean cloth. Then, use a dry cloth or a wet vacuum to extract excess water from the underlay. Ensure that the area is completely dry to prevent mold and mildew from reoccurring.
With these steps, you’ll effectively address mold and mildew issues in your carpet underlay. Remember always to keep the area well-ventilated and clean to maintain a healthy and pleasant living environment for you and your family.
Cleaning Other Stains from Carpet Underlay
Now that you have addressed the mold and mildew related issues, its time to address other capet underlay stains. This process of cleaning the underlay starts will choosing the right cleaning solution.
Choose the right cleaning solution: Using an appropriate cleaning solution helps remove stains and odors effectively. You can either use a commercial carpet cleaner or create your own cleaning solution. Make sure to choose a product suitable for your underlay material:
- For waffle underlay, try a gentle detergent without harsh chemicals.
- For urethane, work with a cleaner specifically designed for this material.
- For flat rubber, use a solution with mild, alkaline-based ingredients.
Use proper cleaning tools: Gear up with suitable cleaning tools to make your underlay cleaning more efficient. Some tools to consider include:
- Soft-bristled brush: Can target stubborn dirt and stains without damaging the padding material.
- Microfiber cloth: Useful for wiping down the area after applying cleaning solution.
Apply cleaning methods: To clean your underlay effectively, follow these steps:
- Gently scrub the stains and dirt with the brush, avoiding too much pressure.
- Use a clean cloth to apply the cleaning solution, ensuring it is soaked well and wrung out until it is just damp.
- Rinse the area with clean water, gently dabbing it with a cloth to remove any remnants of the solution.
By following these cleaning steps, you can provide the best care for your carpet underlay and ensure a comfortable and healthy living environment.
Drying the Underlay
Drying the underlay is a crucial step in the cleaning process, and it usually requires a combination of approaches for best results. Here’s a step-by-step guide to help you get the job done:
- Ventilate the area by opening windows and doors. Fresh air circulation can significantly speed up the drying process.
- Use fans to facilitate air movement. Position them strategically to achieve maximum airflow over the damp underlay. You might also consider using an industrial fan for quicker results, especially in larger spaces.
- Dehumidifiers can be highly effective in reducing ambient moisture levels. Place one near the damp underlay to remove excess water from the air, and remember to empty the water collection container regularly.
- Monitor the drying progress by checking the underlay’s moisture levels periodically. You can use a moisture meter, or simply feel it with your hands to assess whether it’s still damp.
- Rotate and reposition the fans and dehumidifier as needed to ensure even drying across the entire underlay.
Remember, it’s important to be patient and allow enough time for the underlay to dry completely – this may take several hours or even days, depending on the initial moisture levels and environmental factors.
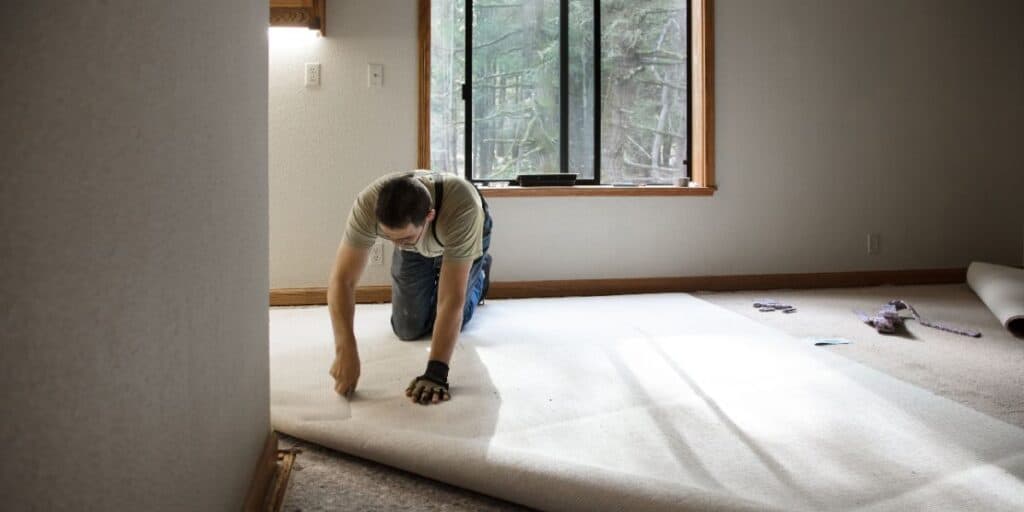
Reinstalling the Carpet
After thoroughly cleaning and drying the carpet underlay, it’s time to reinstall the carpet. Follow these simple steps to ensure perfect carpet installation, even for a DIY novice:
- Prepare the subfloor: Before laying the carpet, make sure your subfloor is clean and free from debris. You can use a broom or vacuum to clean the surface thoroughly.
- Inspect the carpet underlay: Ensure that the underlay is dry and free from any damage. Replace it if necessary, as a damaged underlay can negatively impact the lifespan and comfort of the carpet.
- Lay the carpet: Roll out the carpet along the floor and make sure it covers the entire area. Trim the edges using an angle grinder or sharp scissors, leaving approximately 2 inches of excess carpet around the perimeter. This excess ensures proper fitting and can be trimmed later.
- Secure the carpet: To secure the carpet in place, use double-sided tape or carpet adhesive. Apply the tape or adhesive along the edges of the room, making sure to follow the manufacturer’s instructions.
- Stretch the carpet: Using a carpet stretcher or knee kicker, stretch the carpet to eliminate any wrinkles or bubbles. Start from the center of the room and work towards the edges.
Some additional tips for a successful carpet installation include:
- Keep the room well-ventilated during the process, as some carpet adhesives may emit strong odors.
- Work carefully with sharp tools, such as angle grinders or scissors, to avoid accidents.
- If you are unsure about any part of the installation process, consult a professional or watch a tutorial to ensure correct technique.
By following these steps, you can confidently reinstall your carpet after cleaning the underlay, making your space look fresh and inviting.
Maintaining a Clean Carpet Underlay
Maintaining a clean carpet underlay is essential for the longevity and appearance of your carpet. With the right care and expertise, you can preserve your underlay and avoid the need for professional cleaning services too frequently.
- Vacuum regularly to prevent dirt and debris buildup in the carpet and the underlay. This simple step goes a long way in keeping your underlay in great condition.
- Address spills and stains promptly. The longer they sit on your carpet, the more likely they are to seep through and damage the underlay. Use appropriate cleaning products, and make sure to blot, not rub, the spot.
- Schedule a professional cleaning at least once a year to extend the life of your underlay and maintain a fresh appearance. Industry experts have the knowledge and tools to tackle deep-set grime that everyday maintenance may miss.
Here are a few additional pointers for maintaining a clean carpet underlay:
- Invest in a good-quality vacuum cleaner with adjustable settings and suitable attachments. This will ensure your vacuum works efficiently in removing dirt from both the carpet and the underlay.
- Rotate your furniture occasionally to avoid excessive pressure on certain areas of your carpet and underlay. This can help prevent premature wear and tear.
- Consider using area rugs to protect high-traffic zones in your home. They can absorb dirt and wear, reducing the impact on your carpet and underlay.
By following these simple yet effective measures, you can ensure your carpet underlay remains clean and in good shape, prolonging the life of your carpet and enhancing the overall look and feel of your home.
Conclusion
In conclusion, cleaning your carpet underlay might seem daunting, but with a proper step-by-step guide, you can effectively maintain its cleanliness and extend its lifespan. Below are the key takeaways to remember:
- Remove the carpet: Gently pull back the carpet to access the underlay. This will allow you to thoroughly clean the padding and eliminate hidden dirt.
- Vacuum: Use a vacuum with a HEPA filter to get rid of debris and loose dirt from the underlay. This helps keep your cleaning area as dust-free as possible.
- Treat stains: Apply an cleaning solution to address any stubborn stains. Be sure to use a damp—not wet—cloth to avoid over-saturating the underlay.
- Dry the underlay: Ensure the underlay is completely dry before reinstalling the carpet. This prevents mold or mildew from forming in your home.
Your efforts will result in a refreshed and comfortable living space for you and your loved ones. So, go ahead, give your carpet underlay the attention it deserves, and enjoy the benefits of a well-maintained carpet.
Frequently Asked Questions
How to properly clean a carpet underlay?
To clean a carpet underlay properly, first remove the carpet to access the underlay. Use a vacuum to remove dust and debris, and apply a water and oxygen bleach solution with a clean cloth to remove stains. Then, let the underlay dry completely before reinstalling the carpet.
What are the best techniques for washing underlay?
- Vacuum regularly to remove dust and debris
- Use a water and oxygen bleach solution to remove stains
- Gently scrub the stained areas with a clean cloth
- Allow the underlay to dry completely before reinstalling the carpet
What tools are needed for deep cleaning carpet padding?
For deep cleaning carpet padding, you need:
- A vacuum cleaner
- A clean cloth
- An oxygen bleach and water solution
- A putty knife (for lifting carpet edges)
What is the process for cleaning carpet backing?
To clean carpet backing:
- Gently lift the carpet to expose the backing
- Vacuum to remove loose debris
- Apply a water and oxygen bleach solution to stains
- Gently scrub stained areas with a clean cloth
- Allow backing to dry completely before reinstalling the carpet
How to maintain cleanliness of carpet underlay?
- Vacuum the carpet regularly to remove dust and debris
- Spot-clean stains on the underlay as needed
- Schedule a deep clean once or twice a year to keep the underlay fresh
- Use carpet protectors to prevent mold and mildew growth
What common mistakes to avoid while cleaning carpet underlay?
- Avoid using too much water, which can cause mold and mildew
- Don’t use harsh chemicals that may damage the underlay
- Don’t rush the drying process; allow the underlay to dry completely
- Don’t neglect regular vacuuming and spot-cleaning for optimal cleanliness